CUSTOMIZE ZAZZLE WEDDING INVITATIONS

In this guide we show how Zazzle customers can use the new Zazzle Design Tool for personalization of products, using as an example a Save the Date card published by Hallmark, a leading brand, on Zazzle.
Many wedding invitations at Zazzle already have placeholder fields ready for completion so that all you need to do is to fill in the fields with details of your wedding and place your order. In such cases you may not need to customize the card any further.
But what if you want to change characteristics, such as font, size and color, or if names are too long to fit in the spaces available, or placeholders for details have been omitted by the designer? In these case you will need to customize the invitation using the Zazzle Design Tool.
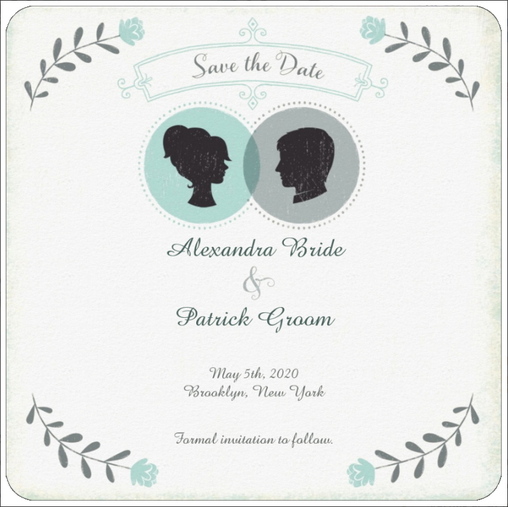
Figure 1 shows the His and Hers Save the Date Announcement Card as published by Hallmark on Zazzle. If you only need to change the names and venue then personalize and order. Perhaps you agree with us that the bride and groom names, and venue details are hard to read. In this guide we will show you how to change the format to something more presentable using the New Design Tool, as shown in Figure 2.
By the end of this guide you will have learned how to use the New Zazzle Design Tool to :
Open the Invitation in a new window and move it to one side so that you can work alongside it with this guide.
By the end of this guide you will have learned how to use the New Zazzle Design Tool to :
- Change font style
- Change font sizes
- Change font colors
- Edit text
- Change background color
- Style the card (add rounded corners)
Open the Invitation in a new window and move it to one side so that you can work alongside it with this guide.
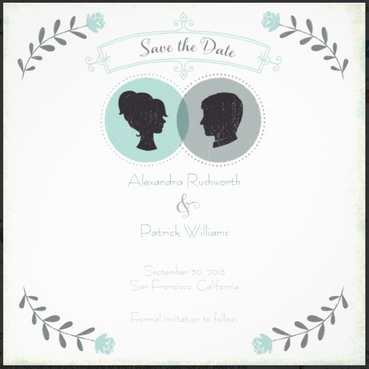 Fig 1: Hallmark 'His and Hers' Save The Date - The Original Fig 1: Hallmark 'His and Hers' Save The Date - The Original
|
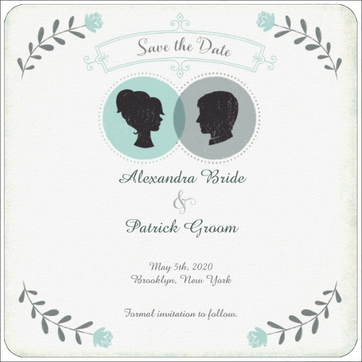 Fig 2: The Hallmark card, enhanced with the Zazzle Design Tool Fig 2: The Hallmark card, enhanced with the Zazzle Design Tool
|
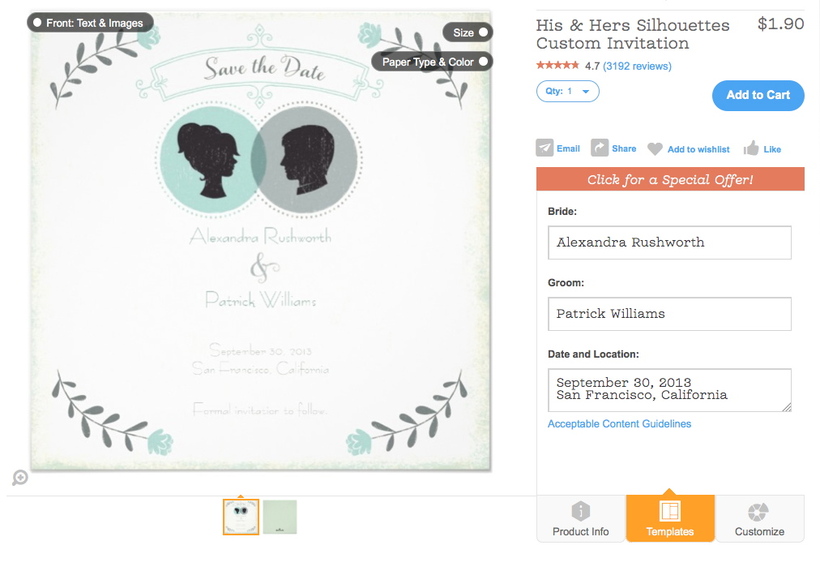
Fig 3: Invitation viewed in New Design Tool
STEP 1 - Selecting Text
Click on the circle with label called Front: Text & Images as shown in Figure 3 top left corner. The panel in Figure 4 is displayed with a black wheel pie menu. Click on the Layers segment to select it. Click on the layer with the text Alexandra (bride's name layer). It highlights in orange. Now click on the Text segment of the black wheel pie menu to select it. The design tool now shows options for text shown in Figure 5.
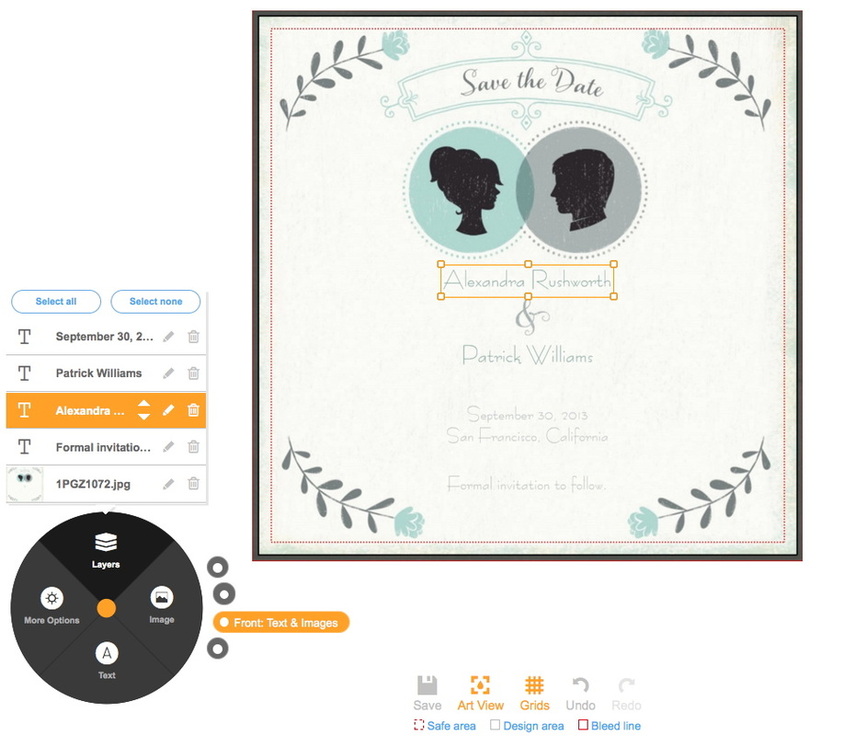
Fig 4: The Layers Segment of the Black Wheel Pie Menu
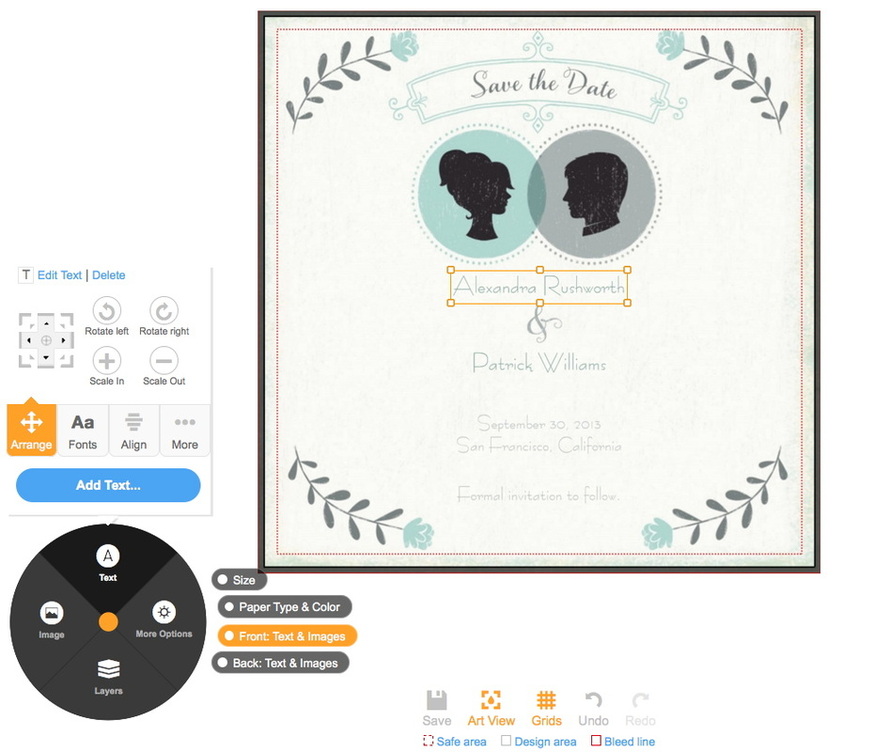
Fig 5: The Text Segment
STEP 2 - Changing Font Style
The Text segment of the black pie menu gives a range of options for text editing. We want to edit the font characteristics, so click on the Fonts icon (to the right of the Arrange option highlighted in orange). The Design Tool shows the Font editing page, shown in Figure 6 below. We can use this panel to change text alignment and position in addition to font style, color and size but we will just edit the latter for now.
We know that only one text field has been selected for editing because it is surrounded by an orange box (the field containing Alexandra Rushworth). We could have selected more than one text layer in Figure 4 and all selected text fields would have orange boxes.
Click on the Font button (showing BernhardFashion BT) and select a new font from the list presented, as shown in Figure 7. The selected font is applied to the text, as shown in Figure 8.
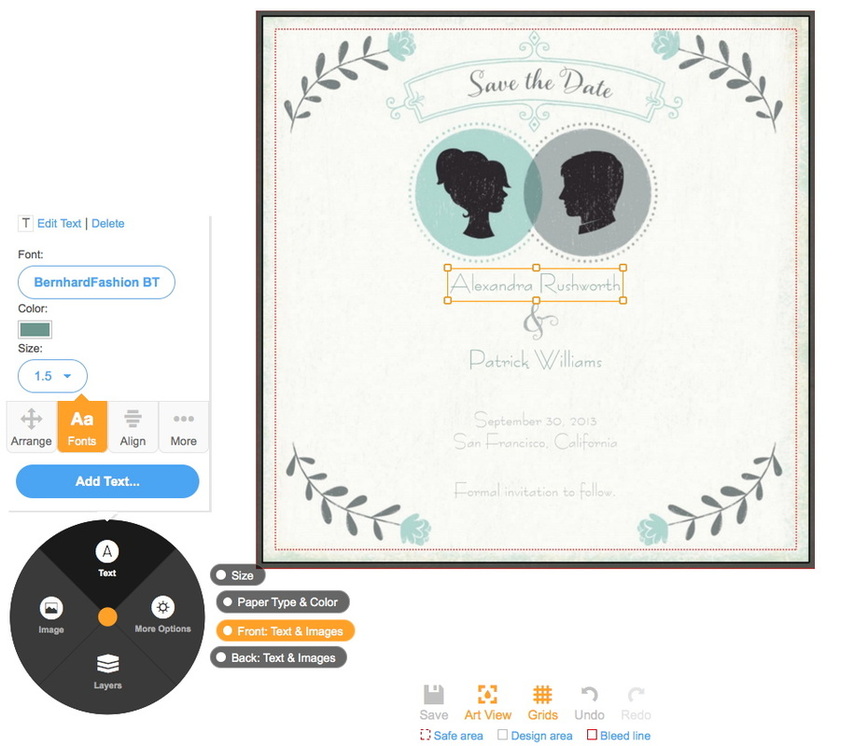
Fig 6: The Fonts Panel
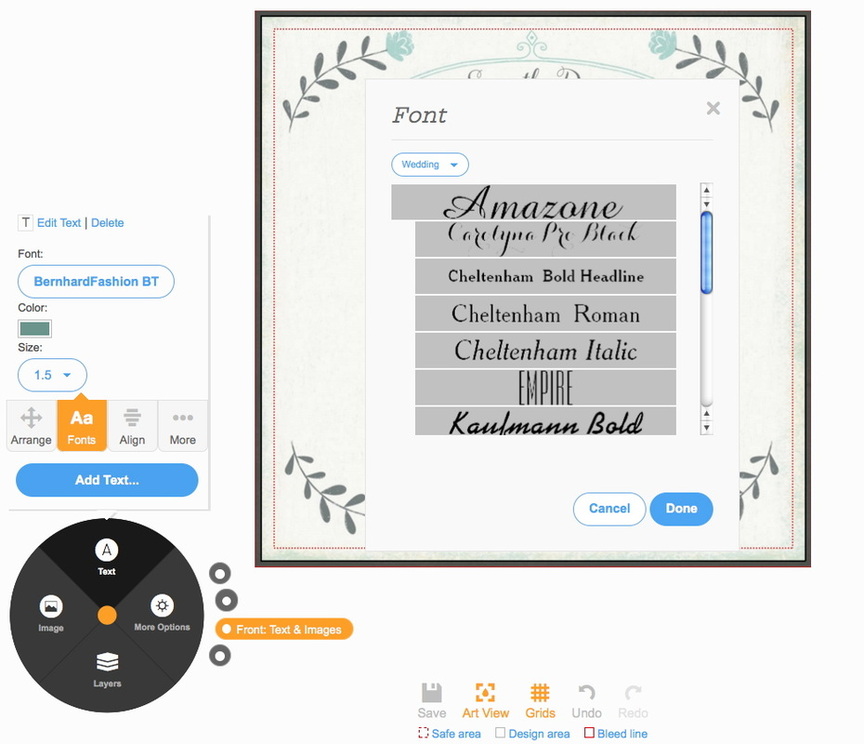
Fig 7: Selecting A Font
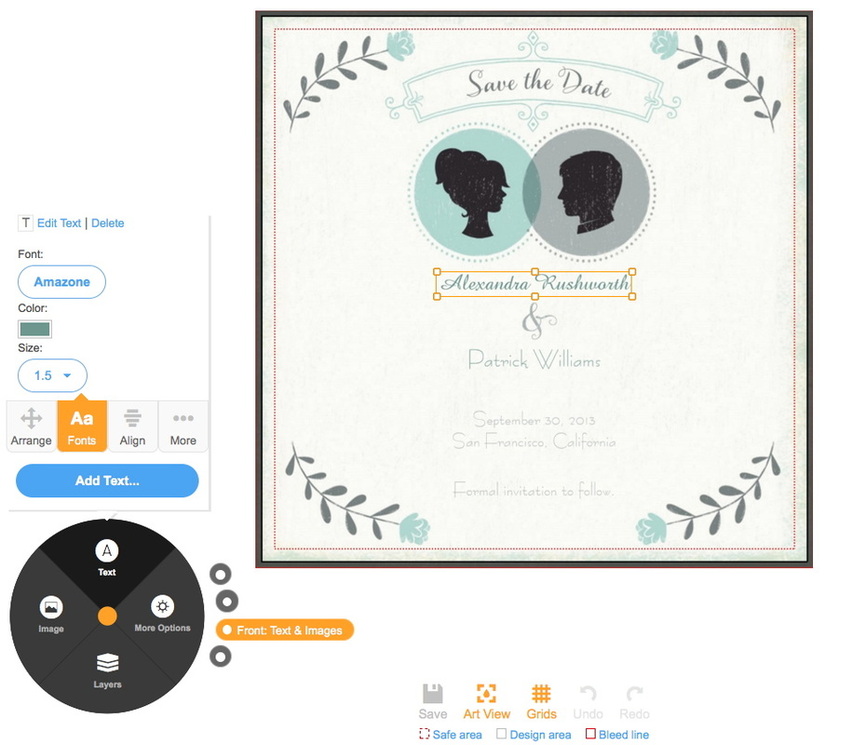
Fig 8: The selected font is applied to the text
STEP 3 - Changing Font Size
Click on the Size button. Choose a font size from the list provided as shown in Figure 9. The new font size will be used on the selected text layer (it is still the bride's name field) as shown in Figure 10.
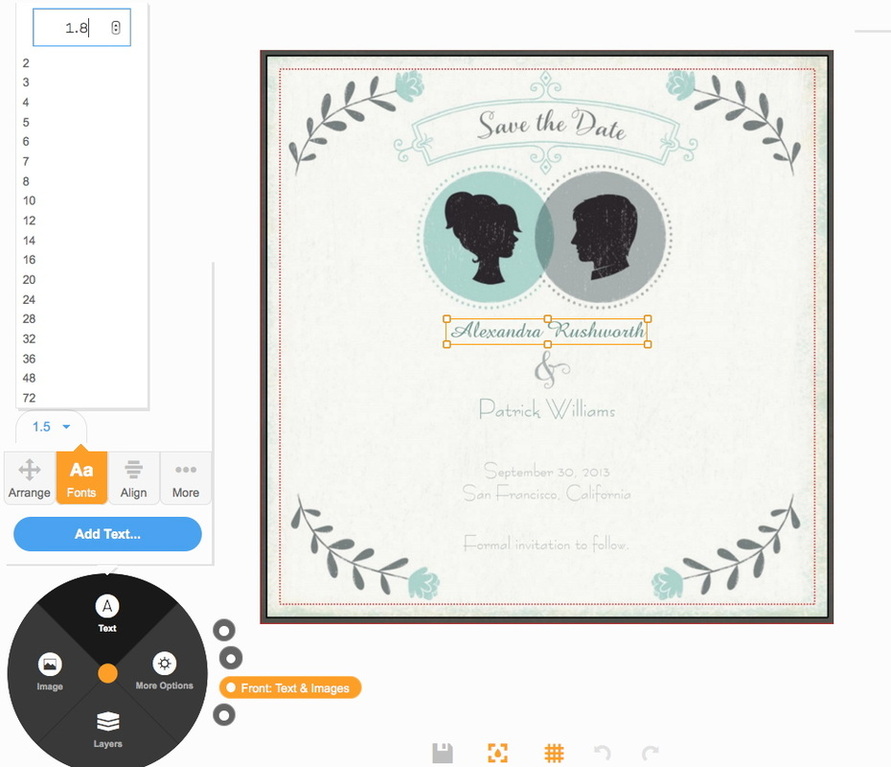
Fig 9: Apply font size change
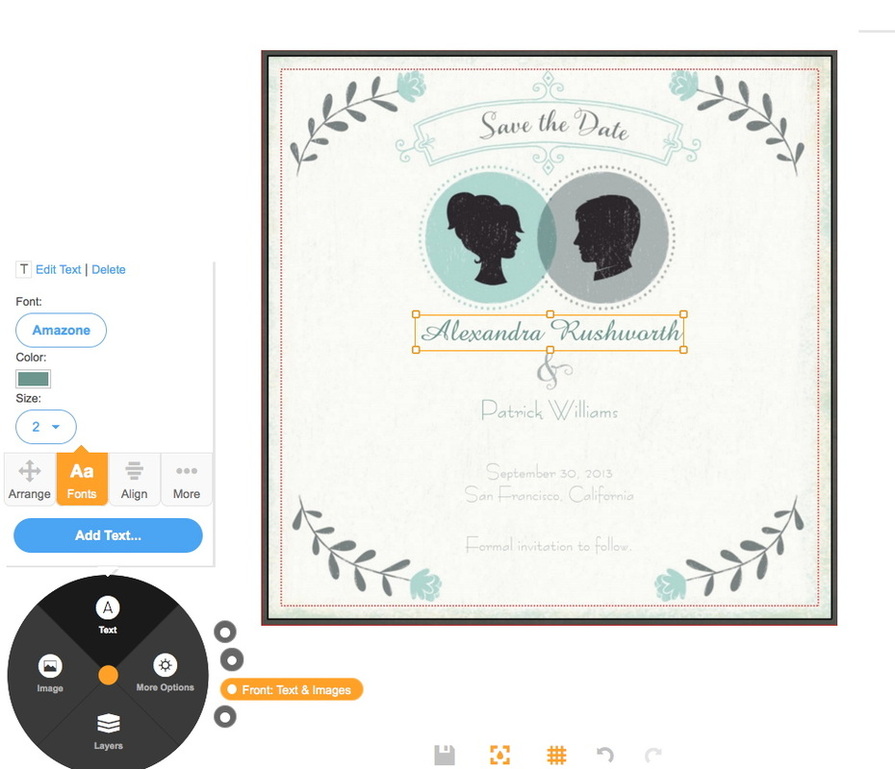
Fig 10: Font size changed
STEP 4 - Changing Font Color
We'll darken the font colors for the text fields. First we will do the bride's name text (this layer is still selected). Click on the Color box. A color pallet appears (Figure 11). We could select a darker color from this palette. We will however use the advanced options. Click on the text called Advanced. The panel shown in Figure 12 appears. Pull the slider down a little bit for a darker hue and click done. (Tip: copy and paste the color code shown to a text editor so that you can apply this value to other fields with the same hue later.)
Figure 13 shows the effect of the color change to the bride's name field. It also shows the layer segment with the Groom's name field selected so that you can repeat the previous steps for changing font, size and color.
Figure 13 shows the effect of the color change to the bride's name field. It also shows the layer segment with the Groom's name field selected so that you can repeat the previous steps for changing font, size and color.
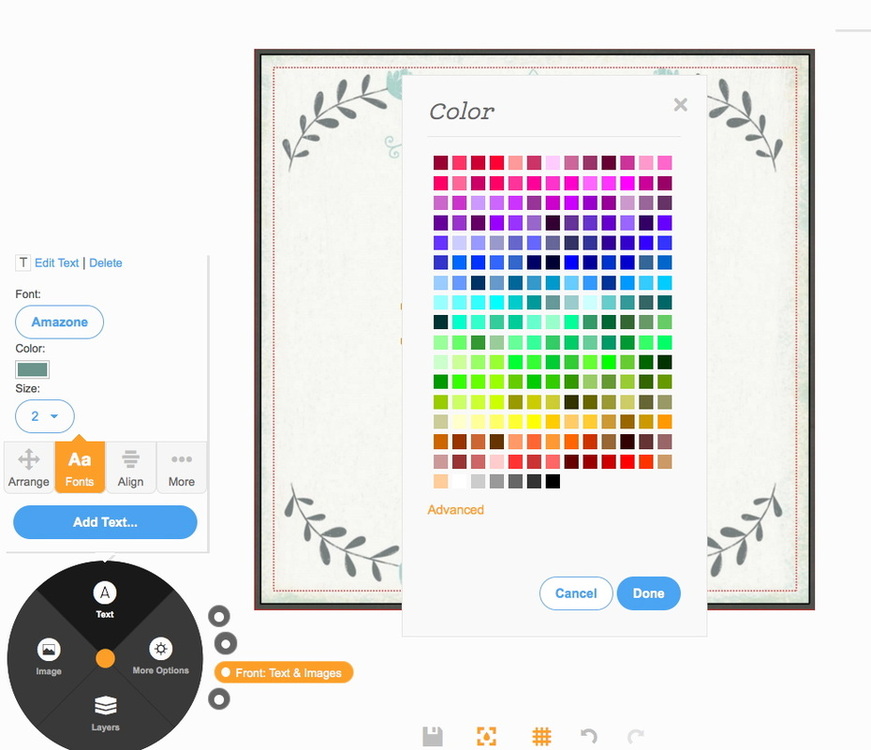
Fig 11: Select a darker color
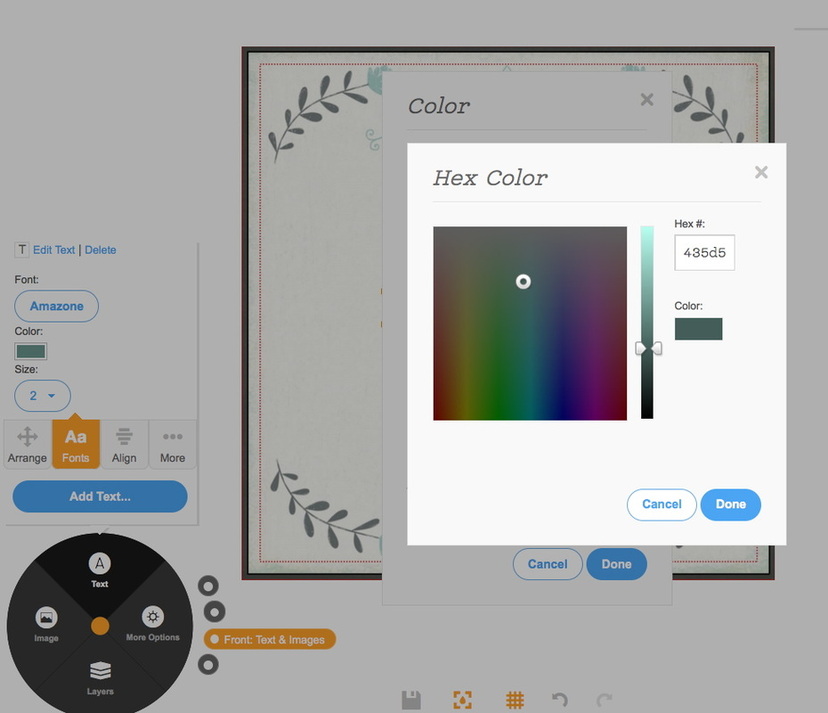
Fig 12: The Advanced Color Panel
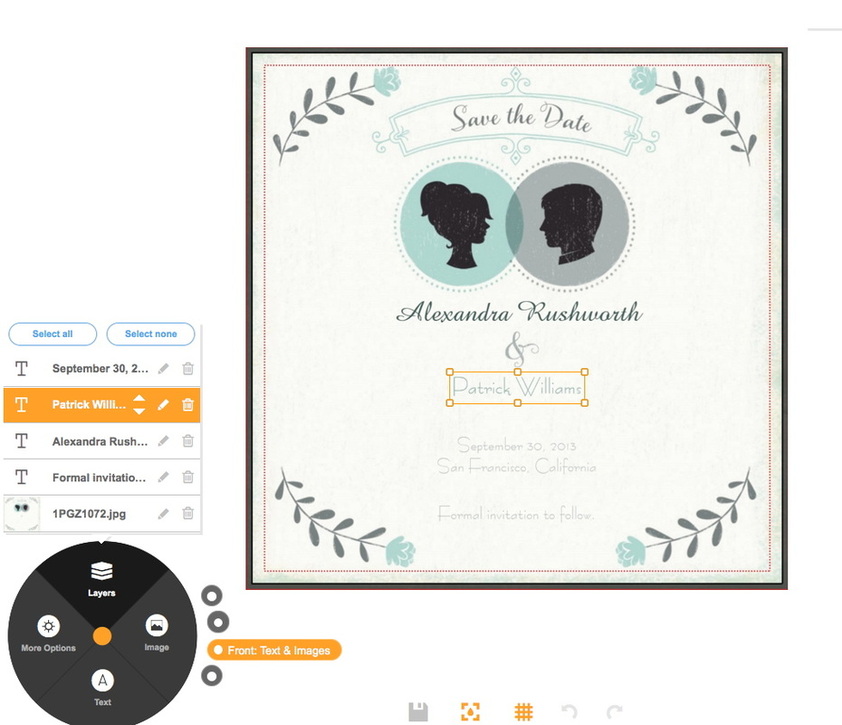
Fig 13: Darker font color applied. Layer for Groom selected.
STEP 5 - Personalize Text
At some stage we need to change the placeholder text to reflect the real bride and groom names, and the date, time and venue of the real wedding. Figure 14 shows the card with the layers segment selected and the date details highlighted. Move your mouse over the highlighted orange box and a blue pen shows . Click the blue pen icon and select Edit Text from the list of action. A text box appears (Figure 15). Replace the existing text with your own wedding details.
Figure 16 shows the text change (as well as color and font changes we have made). Repeat the text change for bride and groom names. You can select these by clicking on the text displayed and then clicking on the blue pen icon. You don't need to select the text layer via the Layers segment of the black pie menu. Figure 17 shows the Formal Invitation message enhanced in the same way. Figure 18 shows the final layout for the front of the card, with the layers segment shown.
Figure 16 shows the text change (as well as color and font changes we have made). Repeat the text change for bride and groom names. You can select these by clicking on the text displayed and then clicking on the blue pen icon. You don't need to select the text layer via the Layers segment of the black pie menu. Figure 17 shows the Formal Invitation message enhanced in the same way. Figure 18 shows the final layout for the front of the card, with the layers segment shown.
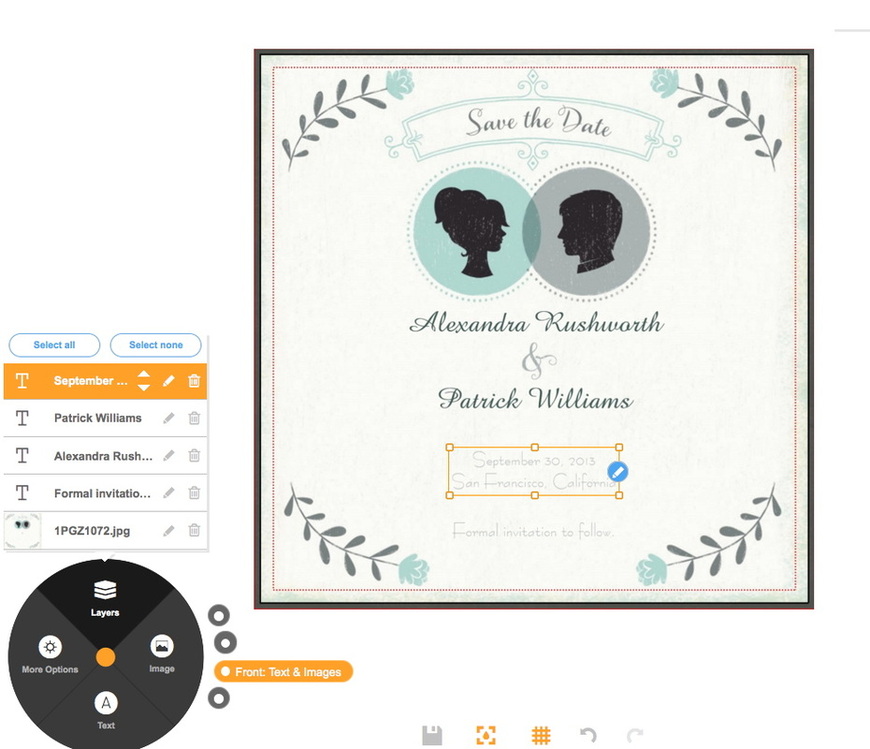
Fig 14: Personalize Text
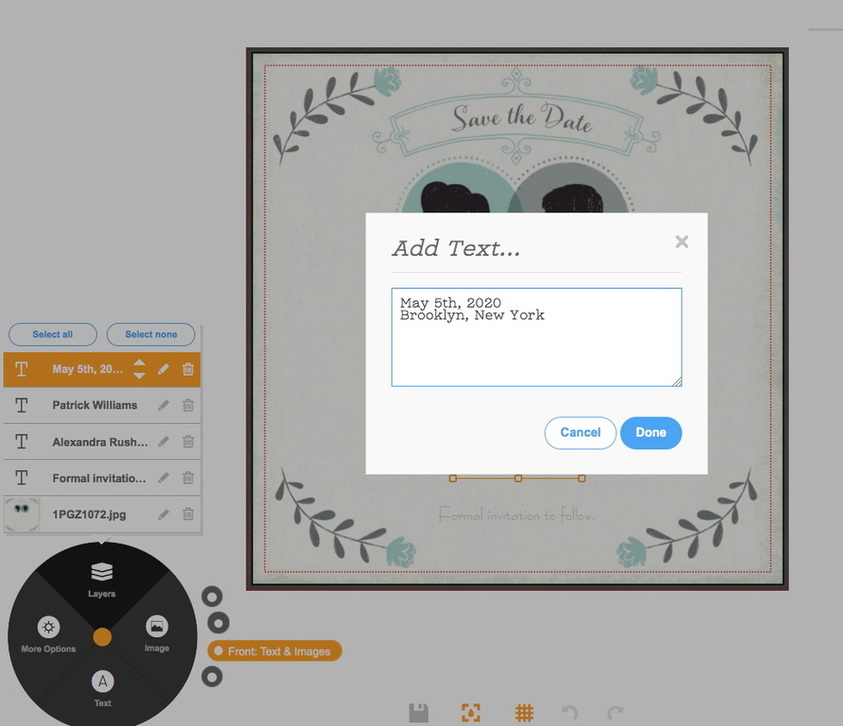
Fig 15: Replacing Text
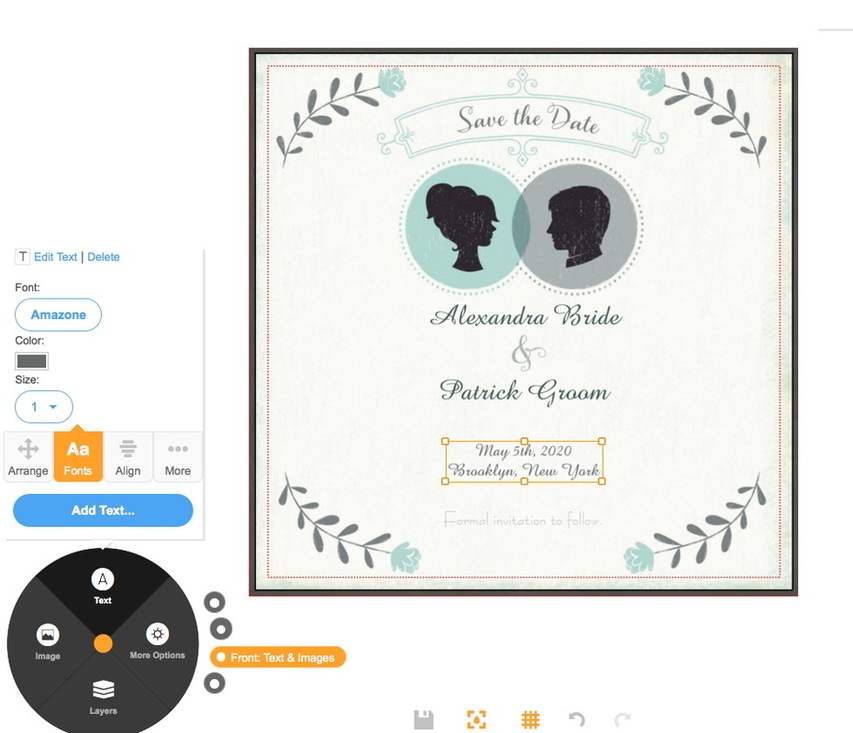
Fig 16: Venue Text changed (and font changes applied)
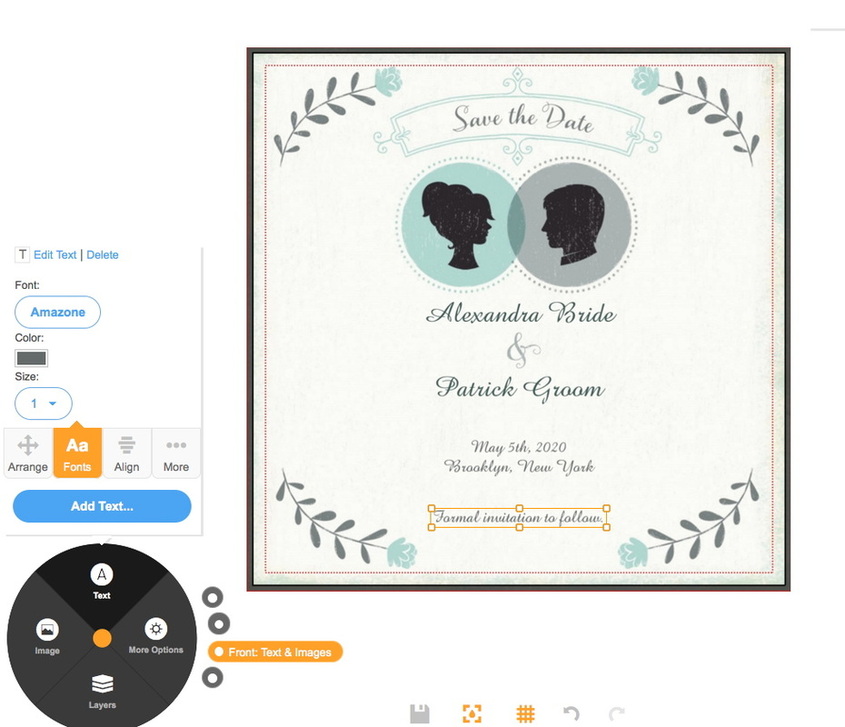
Fig 17: Formal Invitation text font changes applied
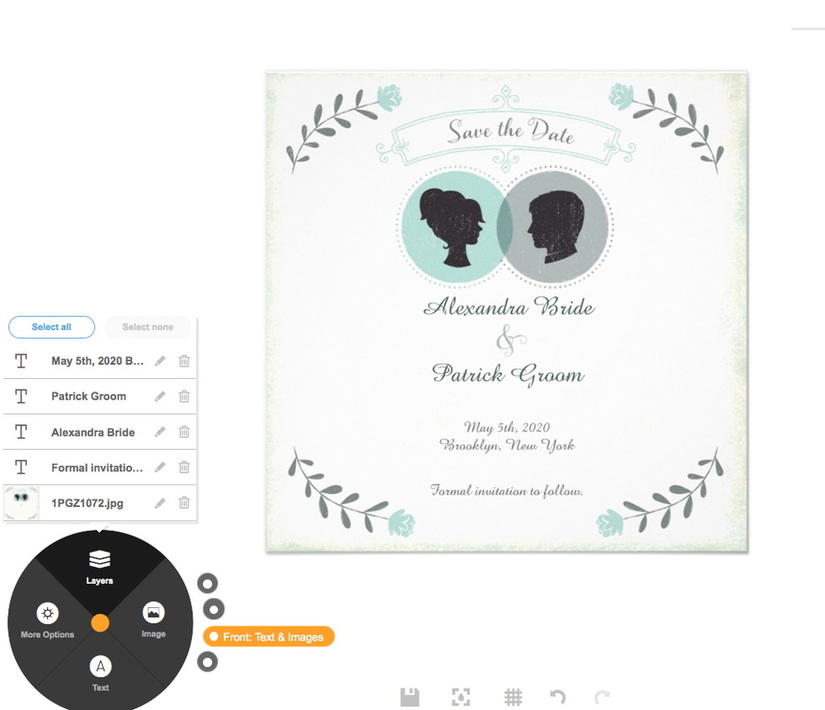
Fig 18: Front completed with layers segment shown
STEP 6 - Customize Back
To the right of the black pie menu are some small black and white circles (the same ones that appear on the product view in Figure 3). So far we've been working with the 3rd circle labelled Front: Text and Images. Select the bottom circle to reveal Back: Text and Images as in Figure 19. Clicking on the Layers segment reveals two layers - The Hallmark Logo, and a green layer (an image filled with the color green). We want the back of the card to be white, so we will delete the layer. Click the green layer to highlight it, then click the trash can icon. Confirm the deletion of this layer (Figure 20).
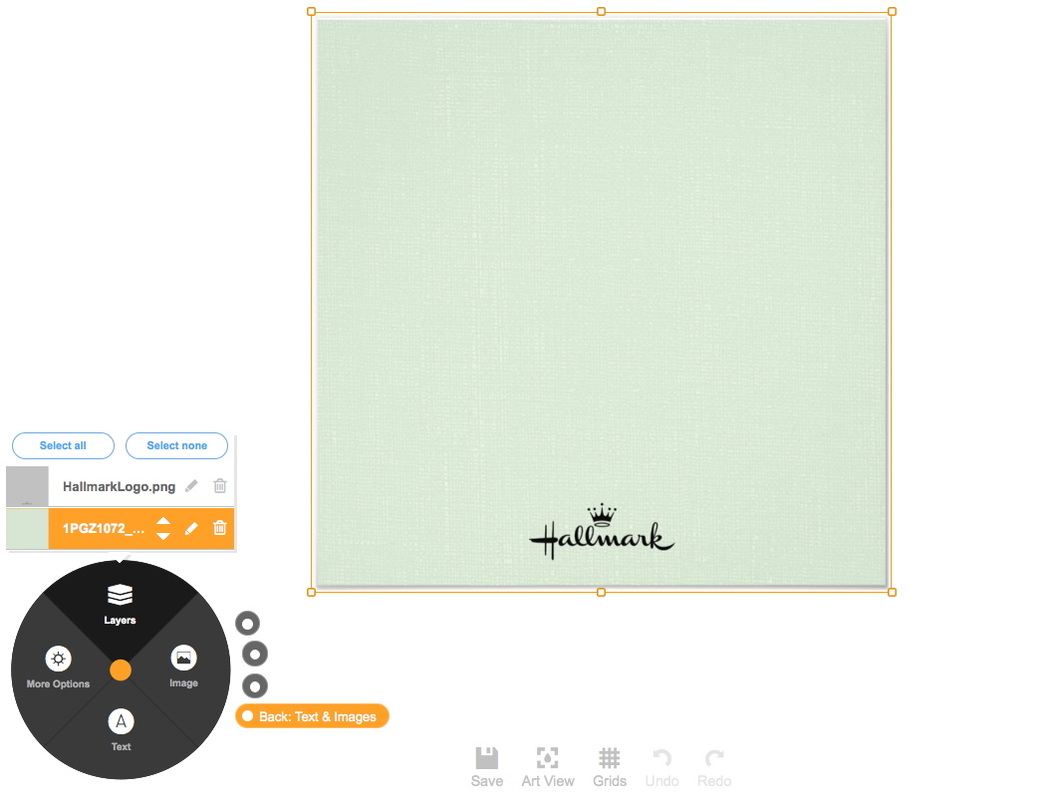
Fig 19: Customize the back of the card
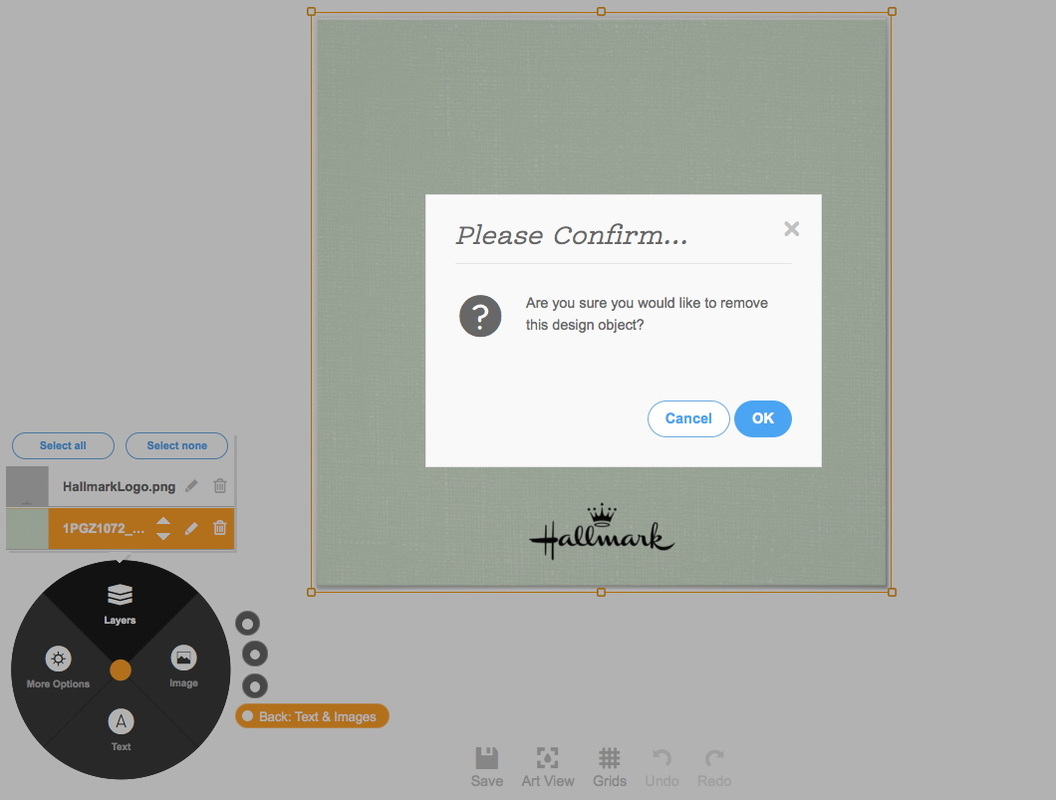
Fig 20: Confirm removal of color layer
STEP 7 - Card Style
To the right of the black pie menu select the circle labelled Paper Type and Color (shown in Figure 21). The segments of the black pie menu change to Shape, Color and Paper Type. In this exercise we are only interested in changing the shape to rounded corners.
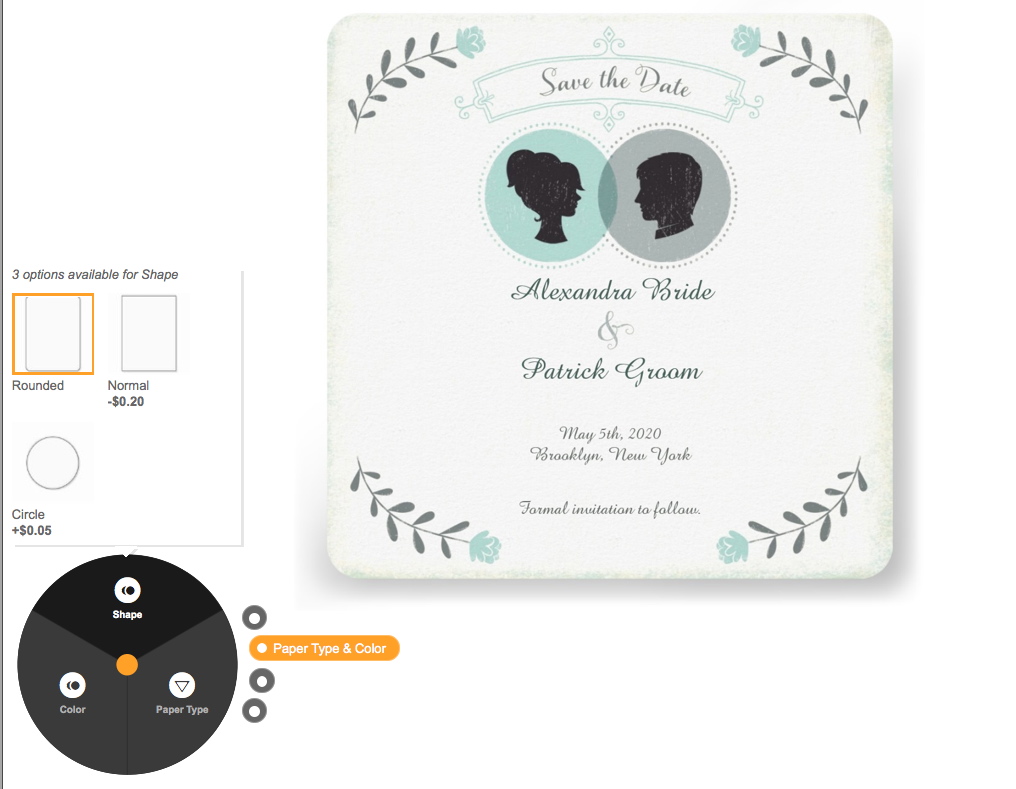
Fig 21: Select Paper Type
STEP 8 - Ready To Order
Do a final check on all the pages of the completed card. Use the Qty pull-down menu to select quantity and prevailing discounts (Figure 22).
Press the Add to Cart button adding any applicable promotional codes in the summary that's displayed (Figure 23).
Press the Add to Cart button adding any applicable promotional codes in the summary that's displayed (Figure 23).

Fig 22: Quantity and Discount Selection
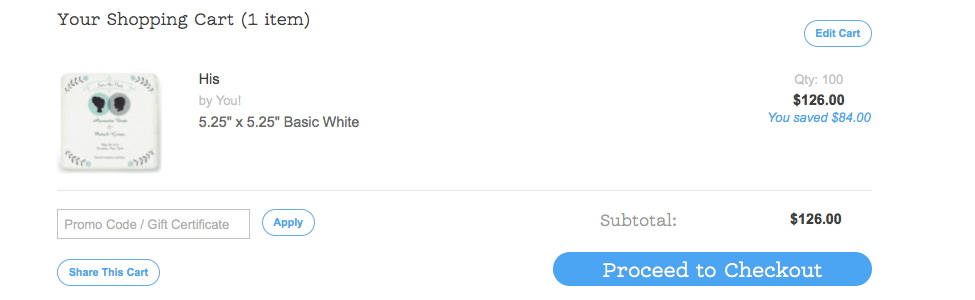
Fig 23: Shopping Cart - Enter promotional codes at this stage
View and Customize the Original Save The Date card at Hallmark on Zazzle
Please note that although you can buy the cards personalized for your wedding you cannot actually sell the customized cards from a Zazzle store. Only the card creator, Hallmark, can do that.
